It's no surprise that I love my Silhouette Cameo cutter. I keep finding new ways to use it! The latest discovery is that I can cut fabric on it, without having to fuse the fabric to an interfacing first! This is great, because interfacing permanently changes the hand of the fabric, and sometimes I just don't want that. But cutting fabric without it can result in a snarled mess. So what's the answer?
You need a Secret Weapon:
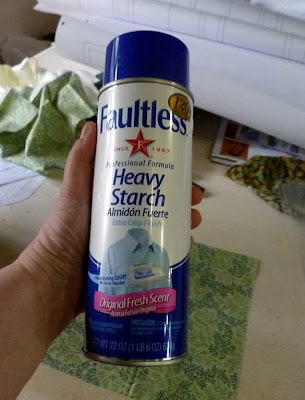
Good old-fashioned spray starch!
Lay the fabric wrong-side-up on your work surface and give it a good, long spray with the starch. You want to really saturate the fabric.

Let it soak in for a few seconds, then lay a press cloth on top (to protect your iron) and press the fabric, using the hottest setting you can. Since this is quilting cotton, I've got my Rowenta cranked up to maximum. Don't use steam!

When it's dry, spray it again and press it again. Make sure it's absolutely bone-dry.
The whole idea is to stabilize the fibers in the fabric so they are cut by the blade, rather than stretching and snagging on it. Spraying the back side of the fabric and using the press cloth helps minimize the shine from the starch.
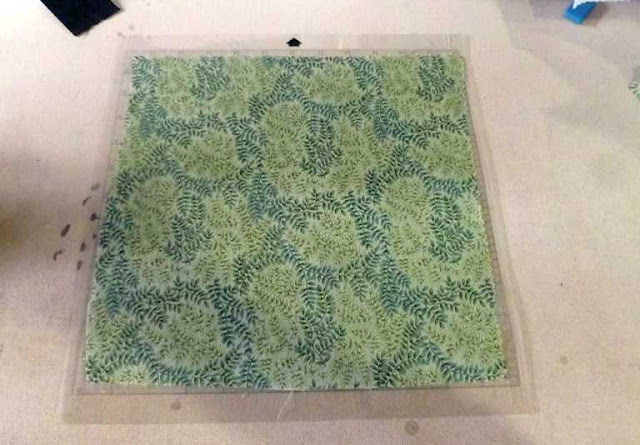
Here's the fabric before starching:

And here it is after. I'm holding the pieces the same way, so you can see clearly that the treated fabric is much stiffer!

Now you need to adhere the fabric to the cutting mat. Make sure the fabric is entirely within the adhesive area; you don't want any stray threads floating around while the mat is going through the machine.
Here is trick #2: Use a hard, flat object and burnish the fabric to the cutting mat, making sure to get the whole piece of fabric bound tightly to the mat.

Now, load the mat into the machine.

Bring up your design in the Silhouette software. Make sure the design fits on the fabric. It's also best to allow about an inch of space between the design and the edge of the fabric, to help prevent snagging.

Here are the settings to use:
Send the design on its way to the machine and let it do its thing!


After you finish your project, the starch in the cut pieces will wash out when you first launder it.
So there you are! Go ahead and cut out your fabric on your Silhouette without having to buy expensive stabilizers or permanently change the hand of the fabric! Let me know if you try this method, and how it works for you!
You need a Secret Weapon:

Good old-fashioned spray starch!
Lay the fabric wrong-side-up on your work surface and give it a good, long spray with the starch. You want to really saturate the fabric.

Let it soak in for a few seconds, then lay a press cloth on top (to protect your iron) and press the fabric, using the hottest setting you can. Since this is quilting cotton, I've got my Rowenta cranked up to maximum. Don't use steam!

When it's dry, spray it again and press it again. Make sure it's absolutely bone-dry.
The whole idea is to stabilize the fibers in the fabric so they are cut by the blade, rather than stretching and snagging on it. Spraying the back side of the fabric and using the press cloth helps minimize the shine from the starch.
Here's the fabric before starching:

And here it is after. I'm holding the pieces the same way, so you can see clearly that the treated fabric is much stiffer!

Now you need to adhere the fabric to the cutting mat. Make sure the fabric is entirely within the adhesive area; you don't want any stray threads floating around while the mat is going through the machine.

Here is trick #2: Use a hard, flat object and burnish the fabric to the cutting mat, making sure to get the whole piece of fabric bound tightly to the mat.

Now, load the mat into the machine.

Bring up your design in the Silhouette software. Make sure the design fits on the fabric. It's also best to allow about an inch of space between the design and the edge of the fabric, to help prevent snagging.

Here are the settings to use:
- Fabric Cutting Blade (the blue one)
- Fabric Cotton Print
- Speed = 4
- Knife Depth = 3
Send the design on its way to the machine and let it do its thing!

When it's done, unload the mat and peel off the excess fabric. Then you can carefully remove your perfectly-cut design!

After you finish your project, the starch in the cut pieces will wash out when you first launder it.
So there you are! Go ahead and cut out your fabric on your Silhouette without having to buy expensive stabilizers or permanently change the hand of the fabric! Let me know if you try this method, and how it works for you!
Thank you for this information! I want to use my Silhouette for fabric more than anything else. I haven't found many tutorials for it.
ReplyDeleteHi! Do you think it would work if the fabric was stiffened with something other than that starch- but with a homemade fabric stiffener? Thanks!!
ReplyDeleteI don't see why not! The whole idea is to get the fibers in the fabric to hold still while the blade is cutting them. So dipping the fabric in a homemade starch solution before ironing should work just as well as the spray starch. Let me know how it works!
DeleteThanks for the tutorial. I don't have one of these, but I enjoyed learning how it works. Faultless is my favorite spray starch.
ReplyDeleteThank you so much for the tutorial! I have been trying to figure out if fabrics can be cut without the interfacing for months now. I could have tried myself, but was too afraid of ruining my machine.
ReplyDeleteWhat happens to the mat? Is it still sticky afterwards, or all linty?
Glad to help! It doesn't affect the mat at all, as far as I've been able to tell. The starch keeps all the fibers in place. Have fun!
DeleteThank you so much. My test run worked. I have been looking for this info. and fretting because I want a fabric lamb profile for some chenille work on a baby rug. I can't use interfacing. I have to wash this rug to make it fuzz up. The starch will be washed out then. Yippee!
ReplyDeleteThank you so much for this!!!! I have been wanting to cut fabric, but the interfacing they sell is so expensive! So excited to try this out!
ReplyDeleteThis method worked great! Saved me from using interfacing or freezer paper. I like to starch the crud out of my quilting fabric anyways :)
ReplyDeleteI just mix up 1 Tablespoon of cornstarch to about 2 cups of water in a spray bottle and save a lot (as I use a lot).
Also, letting your starch SOAK into the fabric before ironing. I spray and stack all my fabric and let it soak in a few minutes before ironing. This prevents flaking and shining.
Thanks again!
Worked awesome! Thanks so much for taking the time to post. This was a great help.
ReplyDeleteThe fabric cutting blade is something extra you have to buy? Thanks!
ReplyDeleteAs far as I know, the blue fabric blade is exactly like the regular blade, just with a different color so you can tell it apart. But just like you wouldn't use your regular paper scissors to cut fabric, you should use a dedicated blade to cut fabric on your Silhouette.
DeleteThank you! Just the info I was looking for! I am going to buy the cameo soon, but Michaels has all the Silhouette accessories 40% off this week. I wanted to purchase some extra mats and blades but all the "regular" blades were sold out. They had plenty of "fabric" blades though... Guess where I'll be going tomorrow! I can mark the housing with a sharpie marker to remind myself if the blade is for fabric or paper! :)
DeleteHi, I just got my cameo and I'm trying to a letter S out of fabric with heat and bond on the fabric. I am having trouble it keeps telling me it can't detect the registration marks not sure what to do can you please help?
ReplyDeleteVanessa
The registration marks are just for "print and cut" projects. If you're just cutting the fabric, there shouldn't be any registration marks. Check the user's guide for info on what those marks are for, and when to use them. Good luck!
DeleteI have cut 5" circles aprov 15 of them at a time, with NO interfacing and NO starch Just have a NEW 12X24 mat and smoothe the fabric on and let her go..Ther only a few spots it misses that I have to cus by hand but I think it save alot of time when I am making my yo-yo;s..n KatGV
ReplyDeletewow! great idea for cutting quick, easy, Yo-Yo's!
DeleteI am SO glad I found this before I tried to cut fabric - which will be next week! I continue to look for alternatives to some of Silhouette's expensive products. LOVE my Cameo, but some of the products are cost prohibitive. I'm a heavy spray starch user, so that is always on hand. THANK YOU!
ReplyDeleteThank you SO much for posting this tutorial! I'm new to the Silhouette and will be using it mainly for quilting and other fabric applique projects. This will save me a ton of money on interfacing, which I didn't want to use anyway. Thanks again!
ReplyDeleteSo excited to see this method as this is how I do my pieced templates since I don't want fusbile webbing on back like my appliques. Only difference is I used liquid starch in spray bottle. Great article - we need more on fabric and the silhouette.
ReplyDeleteLoved this article. This is exactly what I did yesterday except I used liquid starch. I think whatever makes the fabric stiff would work. We need more fabric sillhouette articles.
ReplyDeleteI'm very interested in this machine, and loved your article.Just a doubt concerning size.How many centimeters it cuts? I mean, what is maximum length, we can get with this machine? Thanks for the great explanations.
ReplyDeleteFatima, the Silhouette cuts anything up to 12 inches wide, which is just over 30cm. They don't recommend cutting projects longer than 24 inches (about 61cm).
DeleteYou can cut 12" wide up to 10 feet long using load media setting.
DeleteThanks Welmoed for your reply.In fact, Iam very interested in this machine, but what I really want is to make wall decals for decoration.So, I don't know if it will be so useful, as you said the cutting projects recommended, should be no longer than 61cm.
ReplyDeleteYou can use the silhouette to cut vinyl for wall decoration.
DeleteWall vinyl doesn't require a cutting Matt and you can cut a length up to ten feet. The width is only up to 12"
DeleteI am about to attempt my first "real" quilt (I've done some rag quilts) and thought my silhouette would help me make sure my cuts are accurate so everything fits together well. Thanks for this tutorial. It will make it sooo much easier!
ReplyDeletefab im newto sewing n doing quilting lessons ty
DeleteGlad I found your site. I am in the process of making appliqued shirts and I use the heat bond for most pieces. However, I wanted a ragged edge cross and it will not rag if you put heat bond on the back. Could have experimented, you saved me some time. By the way I am enjoying using mine to cut my pieces for machine applique.
ReplyDeleteHi there
ReplyDeleteI'm from Malaysia. Thank you for sharing this information. I'm currently planning to cut chiffon fabric and to sew it to my dress but putting stabilizers would definitely ruin the flow of the cut flower. Do you think this method would work well on chiffon fabric as well? I was told that Sizzix would perform the job better but I don't like the idea of cutting each flower manually.
Really really appreciate your input with regards to this. Thank you.
I would think that as long as the chiffon was a pretty tight weave, you should be able to use this method. My recommendation would be to try it on some scraps. The only concern I might have is that chiffon frays very easily, so be careful in pulling the finished cut pieces off the mat and clean the mat carefully between cuts. Good luck and let me know if it works!
DeleteHave you cut fabric with fusible interfacing ironed on it so you can fuse to something else after cutting?
ReplyDeleteI have not, but I know others have done so with success. You might want to check out the Silhouette School blog; there is a lot of very good information there!
DeleteThank You so much for this tip! I will surely try it out :-)
ReplyDeleteHello. I found my way here via Pintrest. I tried cutting some cotton fabric with interfacing a few months ago but didn't get a good result. I'll now try the starch method that you recommended. Thanks for this tutorial :)
ReplyDeleteIf you use the load media is it possible to cut longer lengths of suitably prepared fabric. I am thinking fancy quilt borders. :o)
ReplyDeleteUnfortunately, no. If you try to cut the fabric without the mat it will just fall apart. However, you can use the longer 24-inch mat to double the length you can cut.
DeleteBought cameo to cut long lengths of fabric (it says I can cut up to 10' long!) but can't find how to do this...can you help?
DeleteIf you are going to use heat n bond do you starch before that?
ReplyDeleteStarch may interfere with the heat n bond. They always say to wash fabric to remove any stabilizers so the heat n bond will bond correctly. Is starch a stabilizer? I'm not sure.
DeleteThank you so much for the info ....I have a cameo silhouette and I love the machine very much... however I do a lot of appliqué quilts and found that by using appliqués with several layers heat and Bond, my image becomes too difficult to quilt on. Therefore I was trying to find Cameo tutorials that cut fabric without having to use the heat and bond or freezer paper? Thank you soooo much❤️❤️❤️
ReplyDeleteThank you so much for these instructions! I am in the process of doing them now after fighting with freezer paper yesterday LOL
ReplyDeleteMay I just say BRILLIANT!!! I've used a cameo for years now and always hated the darn fusible! Tried a couple different brands and found some that are better, but I've always wanted to be able to cut without it! I've never seen anyone suggest using heavy starch instead of interfacing and like I said...BRILLIANT! Thanks so much for sharing! (I'm sure SilhouetteAmerica loves this! 😆😜)
ReplyDelete