It really was my intention to write about the sewing I did for Diana's wedding. But life has a way of intervening: while all of the wedding stuff was going on, we finally found a buyer for our house, so we were also tossed headlong into the search for a new place to live, plus packing, plus work, plus everything else, so blogging kinda got shoved onto the back burner. But rest assured, I did not get run over by a bus.
Anyway, to recap: in my last post, I wrote about how I was going to make her a wedding coat inspired by a picture she found online. She had already found a dress. We had gone to New York City and found fabric for the coat.
Step one was to make a muslin to check the style of the coat and get the hood figured out. I used PatternMaster to create the draft.
First muslin pass:


Coming Next: Drama in the Sewing Room!!
Anyway, to recap: in my last post, I wrote about how I was going to make her a wedding coat inspired by a picture she found online. She had already found a dress. We had gone to New York City and found fabric for the coat.
Step one was to make a muslin to check the style of the coat and get the hood figured out. I used PatternMaster to create the draft.
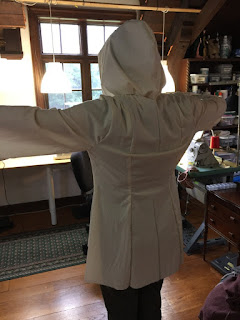
First muslin pass:


The body fit wasn't bad; just a few tweaks needed. But she didn't like the hood; it was too much like a bubble sitting on her head rather than a gentle frame for her face. She showed me a coat she already had and asked if I could copy the hood style; I took a few pictures and modified the pattern to make a hood that flowed smoothly into the lapel to create the kind of look she was after.
What About the Fur?
I was stymied about where to find fur trim that wouldn't require a second mortgage. Then a miracle happened: one of the members of the online sewing group I'm in offered to send me a fur coat she had that she wasn't using. It was a gorgeous Arctic Fox, and went perfectly with the cashmere/alpaca fabric we bought.

I will admit that it was painful to take such a lovely coat apart. I cut it into strips to use for the trim around the hood and cuffs and set it aside.
On to the Wearable Muslin
The next step in the process was to create a wearable muslin to test the final form of the coat. Diana thought it would be great to have a fancy short coat she could wear in the future, so I made this one a little below hip length. This way I could really test the fit of the body, arms, and hood.
It went together pretty well. It's fully lined, with Thinsulate interlining for warmth. I even made bound buttonholes. Here it is on the mannequin, prior to the final hemming. The fur strips are hand-sewn onto the edge of the hood and the cuffs.

Now for the Real Thing!
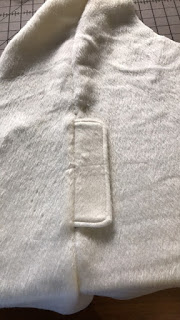
The final coat came together pretty easily. The only tricky part was adding the pockets; I'm still a little wobbly on welted pockets and even with watching some YouTube tutorials I wasn't 100% thrilled with the outcome. But they were good enough. Here was my practice piece on a scrap.

I didn't take any pictures of the assembly process, so here's the coat at the final fitting. It still needed hemming at this point but the rest was done. It is also fully lined and has a layer of Thinsulate.


Coming Next: Drama in the Sewing Room!!
Can't wait for the rest of the story - it's gorgeous!
ReplyDeleteThat is beautiful. I also am looking forward to hearing the rest of the tale :)
ReplyDeleteAnd congratulations on managing that while packing up a house.
So special!
ReplyDelete